Raised bed design details
In our main van blog I promised that I’d put together a more detailed description of the bed and its hoist mechanism. Hopefully, this page will serve that purpose.
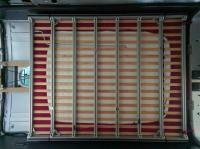
The Frame
We had a few constraints on the bed frame:
-
It needed to be the width of a queen bed (60”). We were willing (in fact, we preferred) to have it be the length of a double bed (75”), since neither of us is over 6’, and it would take up less living space when down if it were shorter.
-
It had to hold two of us (less than 300lbs total) without sagging (either crosswise or lengthwise), and it had to do so when supported by just the corners. Although the sides of the bed are supported full length by the countertops when in the down position, we wanted the option of leveling the bed relative to the van by putting blocks under one end, or under one side.
-
Along with a 4” mattress, it had to be thin enough (vertically) that Paul, at 5‘10”, could still stand under it comfortably.
-
Along with the bedding, we wanted it to weigh 100lbs or less.
I used the free deflection calculator a lot while trying to figure out how to build the frame. I also used a small script, written in the bc language, which implements the equations given in the tslots.com catalog.
I’m going to skip a lot of the analysis here. I did google and find that 50% of a person’s body weight is in their torso, which helped in figuring out the worst-case load on the cross-members of the frame. Very roughly, I assumed that half of our weight (I used 200lbs for that) would be spread evenly across the number of cross-members that could fit in a 2’ length of the bed. And I wanted the deflection to be in the sub-1/4” range.
I tried very hard to use the 1010 series of 8020 extrusions (that’s 1”x1”) for the cross-members, but no matter how I tried, I ended up thinking I’d need too many cross-members to control the deflection, which would in turn drive the weight (and cost!) up too much. In the end we used 1515 extrusions (1.5”x1.5”) for the cross-members. We could have used 1020 (1”x2”) beams, on edge, along the sides – they would have been plenty strong enough to control lengthwise deflection – but there’s no nice way to mate those to the 1515 cross-members. So we used 1530 (1.5”x3”) on edge for the side rails. Using 1515 and 1530 extrusions the frame was plenty strong, so we were able to get away with the most ultralight version of both. (The extrusions come in various grades of heavy-duty-ness.)
Both 8020.net and tslots.com carry stuff that would be appropriate. For me it turned out that 8020.net was a bit cheaper, when shipping and tax were taken into account. Here’s the invoice. I’ve annotated it a bit to explain the pieces, all of which can be found by entering the part number in the search box at 8020.net.
Item                Part Number      Qty  Subtotal   Annotations

1530-ULS            1530-ULS          2    $114.40   75" side pieces, including cutting fee.
Length
75 x $54.75         1530-ULS-Length
Cut to Length
Qty: 1 #7020 $2.45

1515-ULS            1515-ULS          8    $193.44   57" cross-members, including cutting fee.
Length                                               (57" plus 2x 1.5" sides gives 60" total width)
57 x $22.23         1515-ULS-Length
Cut to Length
Qty: 1 #7010 $1.95

4332                4332              16    $68.80   corner brackets to hold cross-members

3320                3320              36    $21.60   bolt/t-nut combo, to hold corner brackets

3302                3302              4      $5.20   studs/nuts -- not essential, but handy.  i used
                                                     these and some washers to guide the support ropes
                                                     under the frame.

4336                4336              4     $25.00   big corner brackets, to help keep frame
                                                     from "racking" into a parallelogram

3355                3355              8     $12.00   double-wide t-nuts, for big corner brackets

2045-Plain          2045-Plain        4      $6.80   end caps for side rails, for aesthetics.

2100                2100              2     $21.60   slide-in tool hangers.  i've never used these.
                                                     but they might be handy.  they rattle a lot.

2829                2829              13    $14.95   rubber door seal, to pad the side rails.  don't
                                                     cut this too short when installing!  it's easy to
                                                     stretch it while installing, and it may "relax"
                                                     to a shorter length after you cut.

3933                3933              8      $6.32   spare drop-in t-nuts.  if you own a bunch of 8020,
                                                     might as well own nuts that make it easy to attach
                                                     to.  i used these when attaching my steel magnetic
                                                     flashlight mounts, for instance.

                           Subtotal:       $490.11
                Shipping & Handling:        $39.25
             Grand Total (Excl.Tax):       $529.36
                                Tax:         $0.00
             Grand Total (Incl.Tax):       $529.36
The total UPS shipping weight (confirmed by bathroom scale :-) for all that was 58lbs. The wooden lattice slats added 8lbs, and the mattress is 28lbs. So total lifted weight, without bedding, is 94lbs.
If I were ordering again, I’d make two changes:
First, I’d eliminate the slide-in tool hangers (part 2100). They were an impulse buy – I thought we might hang a lamp or a clothesline from them. But in the end we haven’t used them, and with no tension on them they rattle like crazy. Definitely not worth the cost.
Second, I’d have 8020 do a little bit of machining on the side pieces. With the parts ordered above, the whole bed frame is held together just with the friction applied by the bolts that hold the angle brackets. That’s probably fine, but if those bolts were to loosen, and the van were in an accident, the frame could come apart, rendering any ropes or safety straps ineffective. To fix this, I ended up tapping the center holes in the two end-most cross-members, and drilling holes in the side pieces to allow the side pieces to be bolted to the ends of those cross-members. The measurements were tricky, and there needs to be a clearance “hole” (really just a widening) in the slot part of the side rail to let the socket head bolt head through. That was very hard to drill neatly and accurately. 8020 will do all of this for you. I think you’d need to order an “End Tap” for both ends of the two outermost cross-members, and maybe a “Counterbore” for the side rails, although looking at their little picture (available after “Add machine services” at the order page), I’m not sure that’s the right thing – their picture makes the counterbore look too deep.
There are a more pictures of the bed frame on the main van page, but here are some detailed views that hopefully show how it all fits together.
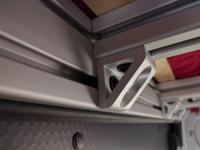
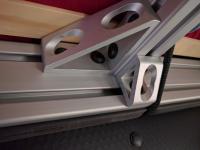
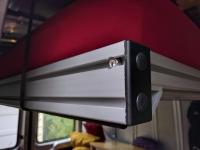
The angle brackets and end-caps are pretty self-explanatory.
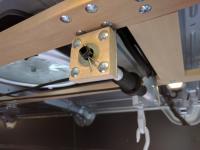
This image shows one of my home-drilled counterbores. This one looks
okay, some of the others not so much. It’s hard to drill into a slot
with a hand drill.
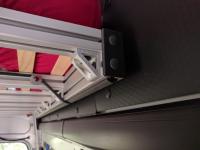
The rigging that raises the frame passes the whole way underneath.
Four bolts and washers guide the rope up tight against the bottom
surface of the cross-members, otherwise the rope would go straight
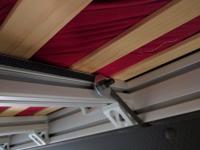 across between the bottom edges of the side rails, reducing the
available headroom. (Drilling holes in the side rails for the rope
to pass through would be possible. But you’d need to protect the rope
from the sharp edges of the holes, and some of those edges will be inside
the extrusion. Plus, once drilled, you could never adjust the bed forward
or backward with respect to the pulleys.)
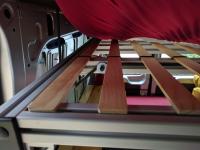
The slats that really support the mattress are also described on the main blog. The 1/8” shockcord is stitched through a long strip of thin scrap that’s inserted into the slot in the extrusion. The “stitches” are lifted up and the 1/4” x 1-5/16” lattice strips from Home Depot are threaded under them.
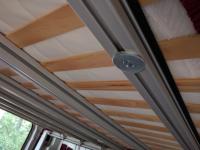
We have a lot of magnetic flashlights and lamps that stick nicely to the
walls of the van. They don’t stick well to the “ceiling”, however, since
the “ceiling” is our aluminum bedframe. A short flat-head 1/4”-20 bolt
through a slightly beveled thick stove washer fixes that. It screws into
a T-nut inserted into the slot.
Finally, while not really part of the bed frame itself, it’s important: when
raised, the bedframe is clipped to the rear of the van with a rated-for-climbing
webbing loop, and rated-for-climbing carabiner.
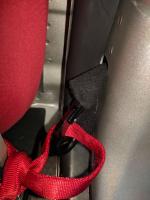 The carabiner goes through existing holes in the upper corners of the rearmost
ceiling rib. It’s padded with a tube of fleece that was hot-melt
glued around it, in order to keep it from rattling. The webbing loop
goes around the rearmost cross-member and threads through itself. This is
why the joint between the end cross-members and the side rails is pretty
important, as mentioned above.
The Mattress and Bedding
We purchased an Ikea foam 4” mattress, removed the cover, trimmed the mattress to 75”, and trimmed and sewed the cover to match. The mattress we bought was a “Malfors”, but I no longer see it on the Ikea website. It’s very firm, and very comfortable.
We use a full (i.e., double) size mattress pad. It fits tightly, the length is right, and it only pulls in a little bit on the sides. Seemed better than having the mattress pad bunching up because it was too long.
We found “RV queen” (75”x60”) sheets at Amazon. They fit perfectly. They were called “Short Queen”
The Hoist
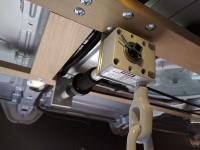
The hoist mechanism is part of a Thule product, intended for lifting a rack-mounted cargo box from the roof of your car to the ceiling of your garage, for storage. It’s Thule model 571 if you’re searching. In the end all I used from that product was the crank, the worm gear drive, the shaft (cut to length), and two of the L-shaped mounting brackets. The pulleys and rope were inappropiate for the task. I think Thule may have discontinued that product, so shop around.
The 1/2” square tube axle is covered with PVC to decrease the number of
axle turns required to raise the bed.
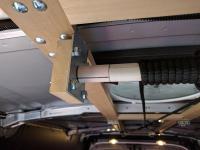
Someone else used a different worm-gear drive from a Racor cargo box hoist, which might be a little cheaper. It also had a different gear ratio. Mine is 7 crank turns to 1 axle turn – theirs is 16 to 1. That’s a lot more cranking to get the bed up and down. However, my crank can be driven backward by the bed when it’s pulled too snugly against the ceiling – sometimes with very cushy bedding it will “unwind” enough that the bed is no longer snug up there, but can swing a bit. On the other hand, I’d be a bit afraid of the force that could be applied to all of the rigging via a 16:1 mechanical advantage from the crank. As it is I had to redo the way I attach the ropes to the winding axle – the first piece of axle I installed got bent from the winding force.
The Rigging
The wooden frame is made from 1”x3” (i.e. 3/4” x 2-1/2”) poplar. It
started as just two strips down the length of the van, bolted at each
rib using rivnuts inserted into a convenient pair of existing holes.
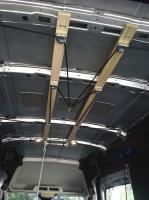
When actually under load, however, the lateral forces on those strips caused the sheet metal of the ceiling ribs to visibly flex. Adding the cross pieces that are visible in other pictures (which were pocket-joined to the long strips using a Kregs jig) stopped this flex.
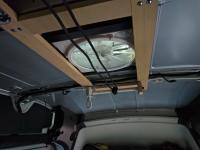
The pulleys were from Lowes. The ones I used are discontinued, unfortunately, but that meant I got them at a bargain price.
The pulley wheels are 1.5”, and they ride on a bushing (1/2” O.D., 5/16”
I.D.). I used ten of those. Six were used as intended by the
manufacturer, attached to the wood frame that is bolted to the
ceiling. The only change made to those pulleys was the addition of
some large nylon fender washers, which take up some extra space
and guarantee the rope can’t slip and get caught between the pulley
and the metal frame.
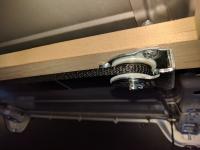
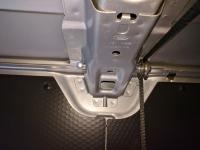
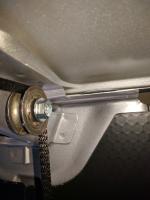
The other four pulleys were disassembled, and only the actual pulley wheel and bushing were used. These were mounted on 5/16”x5-1/2” partially threaded bolts that go through preexisting holes at the top of the roof support ribs. (BTW, I could only find those 5/16” x 5-1/2” bolts at a very good hardware store near me. Certainly not at the big box stores.) The bolt, along with appropriate washers, clamps the bushing, while still allowing the pulley to turn freely.
The ribs of the van have tapered sides. You can see in the above image that there are beveled spacers, made from cut-off pieces of nylon tubing, that fill the gap between the bevel and the washers. This means the bolt can’t be tightened down hard – using a nylon locknut keeps things from loosening.
The “partially threaded” part is important – I used full-threaded bolts at first, and I could see them flexing with the weight of the bed. The material removed to make the threads makes a big difference to the strength of a bolt.
The 1.5” diameter for the pulleys was
important when mounting them to the ribs – any bigger and they’d
have rubbed on the ceiling; any smaller and they wouldn’t
“capture” the rope against the ceiling – there would be nothing to
keep the rope from falling off the pulley when it goes slack.
When I started trying to choose a rope to use, I found that most ropes will stretch quite a bit. I didn’t think I wanted that, so I ended up choosing some 5/16” polyester rope. It’s not as strong, but it’s strong enough, and indeed, it doesn’t stretch and it holds a knot well.
One 50’ length of rope goes around the bed frame and through the pulleys and up to the joining ring. A much shorter length of rope from a second 50’ coil is wound on the hoist axle and attached to the joining ring. That rope is doubled up – not only for added strength, but it helps maintain symmetry as the bed is rising.
The two ends of the rope wind from the center outward. This is
important.
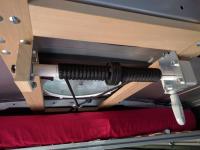
Initially they wound the other way (from outside to the middle), but that puts all of the force of pulling the bed up against the ceiling onto the center of the winding axle – the axle can take the simple load of the 100lb bed just fine, but when an overzealous crankmaster gets involved, the axle can bend. Making the ropes wind outward means the pull is much closer to the axle ends when the forces are greatest – the replacement axle is holding up fine.
A Motor?
We considered adding a motor, and certainly while doing construction and testing and adjusting we used a hook in a cordless electric drill to do the raising and lowering. But it wasn’t that much faster to use the drill over cranking it by hand, and it audibly caused a lot of strain on the motor. After adding in the other complications – wiring, battery failure, etc – we decided to stick with the hand crank.
Caveats
Putting the bed on the ceiling isn’t without its drawbacks, though for us the convenience of getting it quickly set up or out of the way more than makes up for them. The main thing is that while the bed seems like it takes no room, it actually sort of takes up the entire “swept area” that it traverses as it comes down. You really can’t put anything on the walls above countertop height, so you lose a bunch of storage possibilities. The bed at 60” wide is very close to the walls at the top, and only about 6” from the walls at the bottom. (It’s further from the window insets of course.) We’re planning on all-around windows at some point, so not being able to use those walls isn’t a huge deal for us, but it might be for someone. At 60” wide, the fit is tight – I even found when installing some light switches up high on the walls that I had to be very careful about how they would be mounted, since they could easily be struck by the bed if it were swinging, or the van wasn’t level, while it was being lowered.
On the plus side, after leveling the van, we sometimes further level the bed if we think it needs it. Works great.
The End
